1. Go to Accounts From the iPhone Settings menu, navigate to Mail > Accounts.
2. Select Add Account On the Accounts page, tap Add Account, then select Other.
3. Enter Your Information On the new page, tap Add Mail Account and fill in your details as shown in the example. Then, tap Next.
4. Enter Detailed Information On the next page, select POP and fill in all the fields exactly as provided in the email you received. The visual example is for reference only. Then, tap Save.
5. Tap Yes
Within approximately 30 seconds (depending on your internet connection, it may be shorter or longer), the following information screen will appear. Tap Yes to continue.
Congratulations! You have successfully completed the initial steps. Now, let’s go over the following steps.
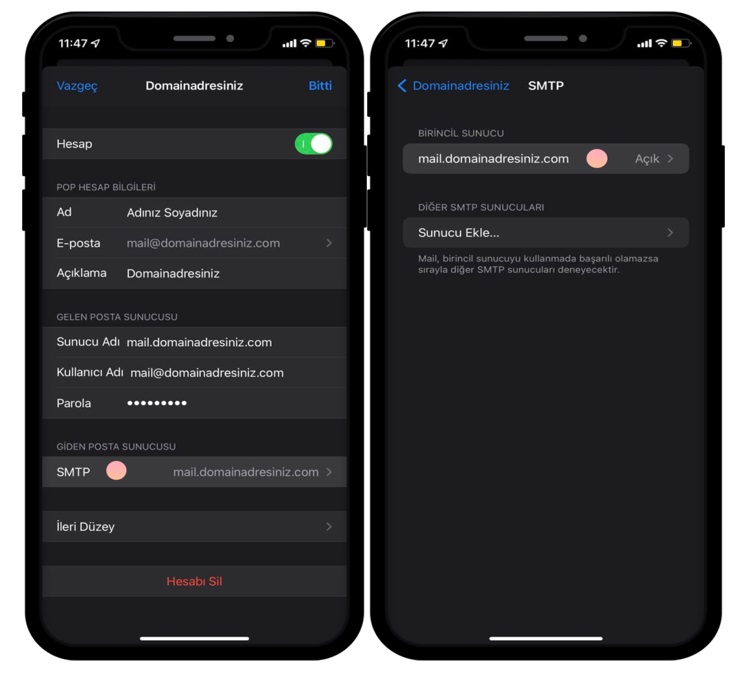
Tap the Account You Added Once the account has been confirmed, return to the Accounts page. Tap the account you just added to access the detailed settings page.
7. Advanced Settings If there is an error in the POP3 port settings, you may experience issues receiving emails. Therefore, check the port settings and adjust them as shown in the example.
8. SMTP Settings If there is an error in the SMTP port settings, you may experience issues sending emails. Therefore, check the port settings and adjust them as shown in the example.
Kurulumu tamamladınız! Eğer hata alırsanız, adımları en başından uygulayınız ve bilgilerinizin (e-mail adresinizin, şifrenizin, sunucu adreslerinin) doğruluğunu kontrol ediniz.